We often get asked what we use for shelter for our KuneKune pigs. We like to use what we call KuneKune Huts. Here’s some rough instructions with a material list and some photos to show you how we make ours.

The material list and instructions are to make 1 hut that is 8 feet long and roughly ~35 1/2 inches tall and ~46 inches wide.

Material List:
1 sheet of plywood for the arches (1 plywood sheet will make at least 1 hut with leftovers, 1 sheet can make 1 1/2 huts, and 2 sheets can make 3 huts as long as cuts are made precise)
Three 8 foot long treated 2x4s (3 per hut for the bottom frame -make sure to use treated for anything that’s on the ground)
Three 8 foot 2x4s (can be non treated) for the top and side frame -the side pieces are mostly just to screw the sheet metal to)
Sheet metal: we recommend three 3 ft x 9ft sheets. (The 9 feet allows for a 6 inch overhang on each end of the hut)
Screws
Primer or paint (if you want to paint the plywood, we recommend you do to protect the plywood and help your hut last longer)
Instructions:
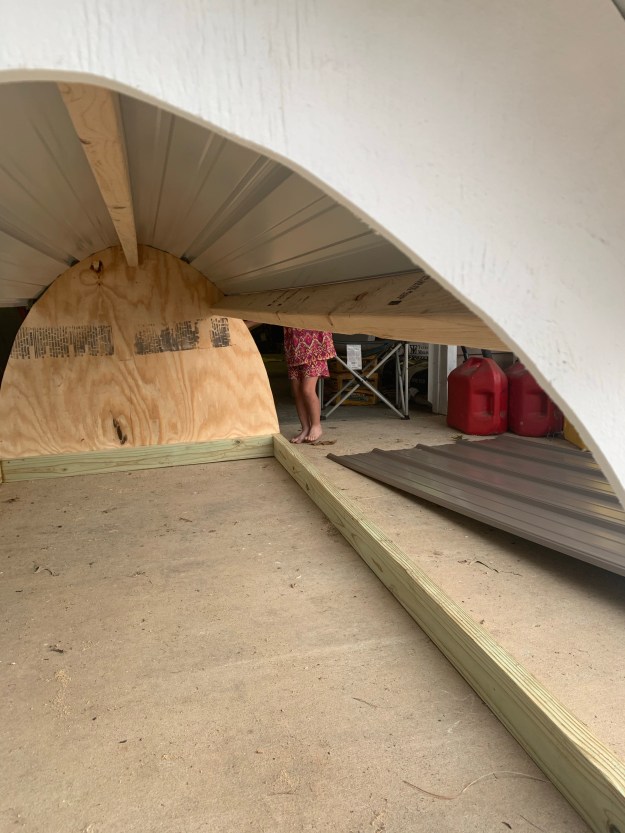
Start by drawing out your arch. The circumference of your arch should be based on the width of your sheet metal. Cut out the arches, both the front and back, make sure to cut precisely if you are trying to conserve your plywood sheet. Our hut arches are roughly ~35 1/2 inches tall and ~46 inches wide.


If you are painting your plywood arches, now would be the time to do that so they can dry while you work on the frame in the next step.

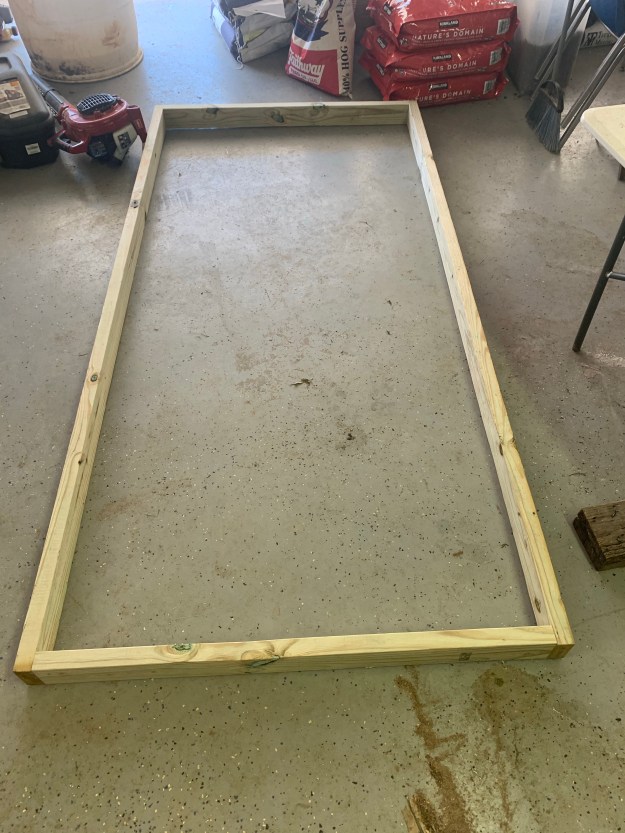
The length of the huts is 8 feet, so if you bought 8 foot boards then no cutting is needed for the length. The width of our huts is roughly ~46 inches. However, you need to base your width off of the circumference of your arch. Now cut your treated 2x4s to your measured arch width. Now screw all your treated 2x4s together to make a rectangle for the bottom frame.


Once your arches are done drying, you now need to screw them to your bottom frame. We recommend raising them off the ground about an inch to help it last longer by not touching the ground.

Next you will screw your first non treated 2×4 on the top to secure the whole hut together.
Before you screw on the side 2x4s, we recommend that you place and hold your sheet metal up on the sides how you plan to have them placed. We use clamps to help with this step. Mark the area that makes the most sense to place these side pieces so that the sheet metal can be screwed into them properly at the right height. We’ve it easiest to put on the top sheet first, then measure and add the other two sheets. Once you’ve found the right spot, screw on both side pieces.

Now you can screw on the sheet metal, make sure to overlap the sheet metal properly so that it keeps the rain out. You are now done!


Let me know if you have any questions. If you end up making one of these huts I’d love to know how it worked out for you!
(678)
